

By BestSeal Engineering Team | | Reading time: 12 min
The short version: Most mechanical seal failures are preventable. Wrong material. Dry running. Bad installation. Cavitation. This guide covers all seven root causes — and what to do about each one before it becomes a shutdown.
Why Seals Fail: The Real Number
A mechanical seal fails. You order a replacement. It fails again in three months.
Sound familiar?
The problem isn't the seal. It's the reason the seal failed — and nobody looked into it.
Industry maintenance data is consistent on this: over 70% of mechanical seal failures are caused by wrong selection or installation error. Not manufacturing defects. Not bad luck.
The seal was telling you something. Most people just replace the part and move on.This guide goes through the seven most common failure causes in order of how often they appear in the field. Each one has a prevention step. Some are free. Some require a small process change. None of them require replacing the same seal every three months.
Cause 1 — Dry Running
This is the most common cause on this list. By a wide margin.
Mechanical seal faces need a thin fluid film between them. That film lubricates the interface. Without it, friction spikes immediately.
What happens next depends on the face material. Carbon-graphite blisters within seconds. Silicon carbide cracks. Ceramic shatters.
Some failures happen in less than 10 seconds of dry running.The tricky part: dry running doesn't always mean the pump is completely empty. Low fluid levels, air pockets, vapor flashing, and start-up sequences before prime is established all create the same result.
Vertical pumps with foot valves, boiler feed pumps, and transfer pumps started before suction lines are fully open are the most common offenders.
Prevention
Install dry-run protection. Flow switches, level sensors, and low-pressure shutdown interlocks cost a fraction of one seal replacement — let alone one production shutdown.
For pumps with delayed prime (long suction lines, tank bottom draws), use a pre-flush arrangement: fill the seal chamber with clean flush fluid before starting the pump.
Never start a pump without confirming fluid is present at the seal. It sounds obvious. It still causes more failures than anything else on this list.
Cause 2 — Wrong Material Selection
A seal that works perfectly in one application can fail in days in another. Same shaft size. Same pressure. Different fluid.
Two failure modes dominate here.
Wrong face material. Reaction-bonded silicon carbide (RBSiC) contains 10–15% free silicon. Strong alkalis — sodium hydroxide, potassium hydroxide — dissolve that free silicon. The face erodes and leaks. Every time. Specifying RBSiC for caustic soda service is one of the most common specification errors in the industry. The correct choice is sintered SiC (SSiC), which has no free silicon.
Wrong elastomer. FKM (Viton) is a widely-used O-ring material. Excellent for fuels, oils, and most acids. Attacked by ammonia, steam, and some ketones. An FKM O-ring in an ammonia refrigeration pump swells, loses sealing contact, and fails within days. EPDM is the correct elastomer for ammonia and steam service.
These errors don't come from bad parts. They come from incomplete specifications.
The Specification You Actually Need
Fluid name is not enough. You need: fluid name, full concentration, operating temperature (min/max), and any cleaning agents the pump sees during CIP or maintenance cycles.
That last one is where people get caught. The process fluid is fine. The weekly caustic clean kills the seal.
Prevention
Cross-check every material against every fluid the seal will contact — including flush fluids, buffer fluids, and cleaning chemicals. Not just the main process fluid.
When specifying for pharmaceutical or food applications, confirm FDA 21 CFR 177.2600 compliance for all elastomers. "Food grade" is not a material specification. It's a marketing term.
Cause 3 — Installation Error
Mechanical seals are precision components. Tolerances are tight. Gaps that look small are actually significant.
Three installation mistakes cause most of the problems in this category.
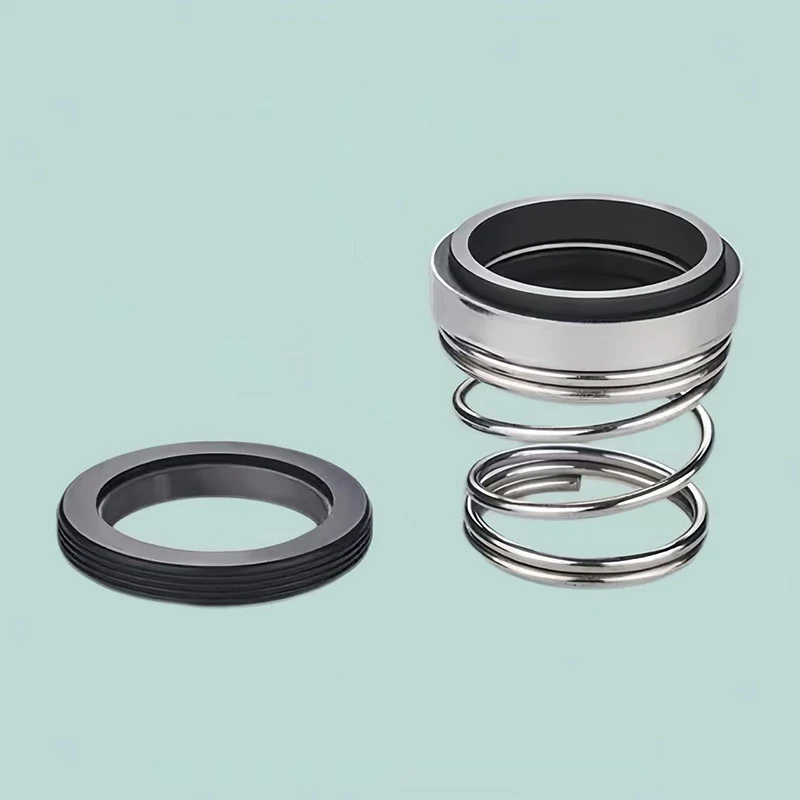
Wrong spring compression. Component seals require the rotating assembly to be positioned at a precise setwork dimension. Too little compression and the faces lose contact at speed. Too much and the face load is excessive — the seal runs hot and wears fast. Both look like "seal failure" when the real cause is a measurement error during installation.
Contaminated faces. The two lapped seal faces have surface finishes measured in nanometers. Touching them with bare hands — skin oil — is enough to cause leak paths. A speck of grit trapped between them creates a scoring groove within minutes of startup.
Pinched or rolled O-rings. Pushing an O-ring over a sharp shaft shoulder or thread without protection cuts or rolls it. The damage is invisible until the pump starts and the O-ring fails immediately.
Prevention
Use the manufacturer's installation instructions. Not a general guide. The actual document for that specific seal model.
Never touch lapped seal faces with bare hands. Use clean lint-free gloves or handle by the outside diameter only.
Use O-ring installation tools and shaft sleeve protectors over threads and keyways. If you don't have them, improvise with tape — smooth, no sharp edges.
Verify the installed setwork dimension with a depth gauge before closing the gland. One measurement. Two minutes. Saves a seal replacement.
Cartridge seals eliminate most of this. The spring compression is factory-set and locked with clips that are removed after installation. If your site has high labor turnover or limited maintenance skill, cartridge seals pay for themselves quickly.
BestSeal provides installation technical support for all supplied seals →
Cause 4 — Shaft Misalignment and Vibration
A mechanical seal is designed to operate with the two faces running true and parallel.
When the shaft vibrates or runs off-center, that assumption breaks down. The faces bounce. They lose contact. They leak intermittently — and then permanently.
Four causes account for most vibration-related seal failures.
Shaft runout. Acceptable TIR (Total Indicator Reading) at the seal location is less than 0.05 mm for most standard seals. Above that, face separation begins at speed. High-speed pumps need tighter tolerances — check the seal manufacturer's specification.
Coupling misalignment. Even 0.1 mm of parallel misalignment at the coupling generates significant radial force at the seal. Check coupling alignment after every bearing replacement and after any piping work near the pump.
Worn bearings. Bearings that are overloaded, under-lubricated, or simply at end-of-life allow shaft movement that exceeds the seal's design tolerance. The seal fails. The bearing is never inspected. The new seal fails the same way.
Hydraulic imbalance. Operating a centrifugal pump far from its best efficiency point (BEP) creates uneven pressure around the impeller. The resulting radial force is transmitted directly to the seal through the shaft. Pumps running at less than 50% or more than 110% of their rated flow are at elevated risk.
Prevention
Check shaft runout before every seal installation. It takes five minutes with a dial indicator. Skip it and you're guessing.
Check coupling alignment after every bearing replacement. Not just on new installations.
If the same seal keeps failing in the same pump, check the bearing condition before ordering another seal. Bearings are cheap. Unplanned shutdowns are not.
Keep pump operating flow within 70–110% of BEP where possible. If your process regularly demands flow outside that range, the pump may be wrong-sized for the application.
Cause 5 — Cavitation
Cavitation is what happens when the fluid pressure drops below vapor pressure inside the pump. Bubbles form. Then they collapse.
The collapse is violent. The pressure spike from a single collapsing bubble is thousands of bar, localized, and repeated thousands of times per second.
Over time, that erodes the impeller. It erodes the pump casing. And it destroys the mechanical seal — both the faces and the secondary sealing elements.
How do you know it's happening? A rattling or crackling noise from the pump, sometimes described as pumping gravel. Pitting on the impeller discharge vanes. Erosion marks on the seal faces concentrated on the fluid-side surface.
Cavitation is a system problem. Not a seal problem.
Prevention
Calculate Net Positive Suction Head available (NPSHa) and compare it against the pump's required NPSH (NPSHr). NPSHa must exceed NPSHr by at least 0.5–1.0 m of margin. Less than that, the pump is operating in cavitation territory.
Never throttle the suction valve to control flow. Throttle the discharge. Suction throttling directly reduces NPSHa and causes cavitation.
Check suction line for restrictions: partially closed isolation valves, blocked strainers, undersized pipe, or excessive suction lift. Any of these reduces NPSHa.
If cavitation is a recurring problem and the system can't be changed, the pump may need to be replaced with one that has a lower NPSHr for the application. Replacing seals repeatedly is not a solution.
Cause 6 — Thermal Shock
Silicon carbide, alumina ceramic, and tungsten carbide are hard. They're also brittle.
Rapid temperature changes create differential expansion stresses that exceed the material's tensile strength. The face cracks. The crack propagates. The seal leaks.
This failure mode is common in specific situations. Cold CIP water hitting a pump that just ran at 120°C. Steam-out procedures on a pump that was at ambient temperature. Hot oil suddenly entering a cold seal chamber after a batch changeover.
The failure looks dramatic — a face that has fractured cleanly across the diameter, sometimes in multiple pieces. Engineers sometimes blame material quality. The cause is thermal management.
Prevention
Allow gradual temperature transitions where possible. For CIP cycles, flush with warm water first before switching to hot caustic.
For applications with unavoidable thermal cycling, upgrade face materials. Sintered SiC handles thermal shock better than reaction-bonded SiC. Carbon-graphite vs. sintered SiC combinations absorb differential expansion better than two hard-face combinations.
Ensure flush and quench systems are activated before hot process fluid reaches the seal. The seal chamber should be at operating temperature before the pump starts, not after.
If your process involves daily CIP, specify this explicitly when ordering seals. A supplier who doesn't know about the CIP cycle cannot spec the right material combination for it.
Cause 7 — Abrasive Solids in the Seal Chamber
The seal faces are lapped flat to within a few light-bands. A single grain of sand between them acts as a grinding compound.
It doesn't take much. Rust particles from old pipework. Scale from heat exchangers. Pigment agglomerates in dye paste. Fine crystalline solids from saturated process fluids.
The wear pattern is distinctive: fine circumferential scratches across the entire face surface, uniform in distribution. The face flatness is destroyed. Leakage increases steadily until the seal is replaced.
And then it happens again. Because the source of the solids was never addressed.
Where the Solids Come From
New installations are the worst. Commissioning flush is critical — pipework contains construction debris, weld slag, and rust from the moment it's fabricated. Pumps that go straight into service without flushing fill their seal chambers with this material.
Ongoing contamination comes from process fluid itself. Printing and dyeing operations, slurry transfer, paper stock pumping, and crystallizing process fluids all introduce solids continuously.
Corrosion products from degrading pipework contribute over time, especially in systems with intermittent flow or dead legs where stagnant fluid corrodes.
Prevention
For clean-fluid pumps with contamination from system debris: install a clean external flush (API Plan 32). Inject filtered, clean flush fluid into the seal chamber at slightly above stuffing box pressure. Solids are pushed away from the faces rather than drawn across them.
For process fluids with suspended solids: use a cyclone separator (API Plan 31) to remove particles from the product flush before it reaches the seal chamber. Or use API Plan 32 with an external clean fluid source.
For severe slurry service — mining, mineral processing, heavy pigment slurries: upgrade to sintered SiC vs. sintered SiC face combination. The additional hardness and resistance to abrasion significantly extends face life even when some solids reach the interface.
Commission new pipework properly. Flush, inspect, flush again. A mechanical seal replaced during the first week of operation is almost always a commissioning problem, not a product defect.
Repair or Replace?
Not every failed seal goes straight to the bin. Sometimes the faces can be recovered.
Re-lapping is possible when: the seal faces have minor wear grooves without deep scoring, the face material is not cracked or chipped, and the flatness deviation is within the acceptable range for lapping recovery (typically within 3–5 light-bands).
Replace the entire seal when: faces are cracked, chipped, or fractured. Elastomers are swollen, hardened, or chemically degraded. Springs are corroded or deformed. Drive pins or drive lugs are damaged.
Attempting to re-use a seal with cracked faces is always a false economy.When in doubt about whether re-lapping is viable, photograph both faces and send to the manufacturer for evaluation. Most experienced seal engineers can give a clear answer from a good photograph.
What to Inspect After a Failure
The failed seal is evidence. Don't throw it away before reading it.
The failure pattern on the faces tells you the root cause. This is not guesswork — each failure mode leaves a distinctive signature.
| What You See on the Faces | Likely Root Cause |
|---|---|
| Blistering, material loss, burnt appearance on carbon face | Dry running |
| Chemical attack, pitting, or dissolution of face material | Wrong face material for the fluid |
| Swollen, cracked, or hardened O-rings | Wrong elastomer for the fluid or temperature |
| Single radial crack or clean fracture across the face | Thermal shock |
| Concentric arc grooves, non-uniform wear band | Shaft runout or vibration |
| Fine circumferential scratches across the full face | Abrasive solids in the seal chamber |
| Pitting on the fluid-side face surface | Cavitation erosion |
| Heat discoloration, spring wear, no face damage | Incorrect spring compression (installation error) |
Photograph both faces before cleaning. Note the wear pattern location — whether damage is concentrated at one angular position (vibration/misalignment) or uniform around the full circumference (dry running, chemical attack, abrasion).
This takes five minutes. It's the difference between fixing the problem and repeating it.
Keeping the Right Spares
For pumps in continuous service, a seal failure means downtime starts the moment the leak becomes unacceptable. If you don't have a replacement on the shelf, downtime lasts until one arrives.
Which seals should you stock?
Pumps that are critical to production with no standby unit should carry at least one complete spare seal — preferably a cartridge seal ready to install. The installation time saving alone justifies the stock investment.
Pumps with standby units need a working seal set but can tolerate a short lead time. Keep at minimum the O-ring set and a complete rotating assembly.
For custom or non-standard seals, lead times from manufacturers can be 4–8 weeks for complex designs. If a pump carries a non-standard seal, check the current lead time and stock accordingly.
Don't over-stock elastomers. O-rings and gaskets have shelf life limits — typically 5–7 years for EPDM and FKM, shorter for PTFE-encapsulated designs. Rotate stock and inspect for hardening or set before installing from older inventory.
Work With a Supplier Who Gets It Right the First Time
Replacing the same seal three times is not a seal quality problem. It's a specification problem.
BestSeal engineers specify seals based on complete process conditions — not just shaft size and pressure. We ask about CIP cycles. About commissioning fluid. About temperature swings. Because that's where failures actually come from.
What we supply:
- Standard single and double mechanical seals — EN 12756, ASME B73.1, GB/T 33509
- Custom-engineered seals for non-standard shafts, extreme temperatures, and special media
- Cartridge seals for critical and pharmaceutical applications
- Complete cross-reference and OEM replacement service — typically 40–60% below OEM pricing
- Technical support on material selection, failure analysis, and flush system specification
Send an Inquiry → Tell us the failure history. We'll specify the right seal for the actual conditions.
Also read: How to Choose the Right Mechanical Seal for Centrifugal Pumps →
FAQ
What is the most common cause of mechanical seal failure?
Dry running is the leading cause. When the pump runs without fluid — even for a few seconds — the seal faces overheat and blister. The second most common cause is wrong material selection: wrong elastomer, wrong face material, or both.
How long should a mechanical seal last before it needs replacing?
In a correctly selected and properly installed application, 2–5 years in continuous service is a reasonable expectation. Demanding applications with abrasive media, high temperatures, or frequent start-stop cycles typically see 6–18 months. Failures under 6 months almost always indicate wrong selection or installation error.
Can a mechanical seal be repaired, or does it need to be replaced?
Minor face wear can sometimes be corrected by re-lapping the faces on a precision surface plate. But cracked faces, swollen elastomers, corroded springs, or damaged drive pins mean a full replacement. Attempting to re-use a seal with cracked faces almost always results in immediate re-failure.
What happens if a mechanical seal runs dry?
The fluid film between the seal faces disappears. Friction spikes immediately. Within seconds — sometimes faster — the faces overheat, blister, and crack. Carbon-graphite faces are particularly vulnerable. Silicon carbide vs. silicon carbide combinations tolerate it slightly better but still fail quickly.
How do I know if my pump is cavitating and damaging the mechanical seal?
Listen for a rattling or crackling sound from the pump — sometimes described as pumping gravel. Check NPSHa against the pump's required NPSHr. If NPSHa is close to or below NPSHr, the pump is cavitating. Inspect the seal faces for pitting or erosion on the seal-chamber-side surface.
What shaft runout is acceptable for a mechanical seal?
For most standard mechanical seals, shaft runout (TIR) should be less than 0.05 mm at the seal location. Above that, the seal faces experience dynamic separation and intermittent leakage. High-speed applications require tighter tolerances — check the seal manufacturer's installation specification.
Does mechanical seal failure always mean visible leakage?
Not always. Early-stage failure often shows as increased leakage vapor rather than visible liquid. Some failures present as face scoring with no immediate external leakage. By the time liquid leakage is clearly visible, the seal has usually been degrading for some time. Regular inspection of the seal area and flush systems catches failures earlier.